One of the most-used and simple-to-use options inside After Effects is to speed up or slow down a clip to achieve our desired outcome. However, it might be simple to use, but if not used right, it might create still frames, and the image will not run smoothly, or you will get a “Quality Check Failed” status if you plan to upload to TV Stations.
Adobe After Effects is my favorite post-production software out there. I can create almost anything with it. This is how an old saying got born at the studio I used to work in: “Anything is possible! We just need time and money.”
In this article, I will cover the ways you can speed up or slow down a clip in After Effects and the pros and cons of each method.
A quick method to slow or speed up a clip
Speeding up or slowing down in After Effects is super easy.
- Just right-click on your clip
- Go to “Time”
- “Time Stretch”, then change your percentage to the desired speed
All professional methods to change speed in After Effects
Method 1: Speed up or slow down with Time Remap
To speed up or slow down a clip in After Effects with Time Remap, you don’t have to go through many steps, and it is easy to understand the process behind it. What does it do? With help from After Effect’s keyframes, it compresses or expands all the keyframes of the video clip you want to be modified.
Ok, let’s do it!
1. Enable Time Remapping
Right-click the video clip or pre-composition, go to “Time”, and select “Enable Time Remapping”. A new parameter will appear in the layer options, and its name is “Time Remap”.

2. Adjust the keyframes
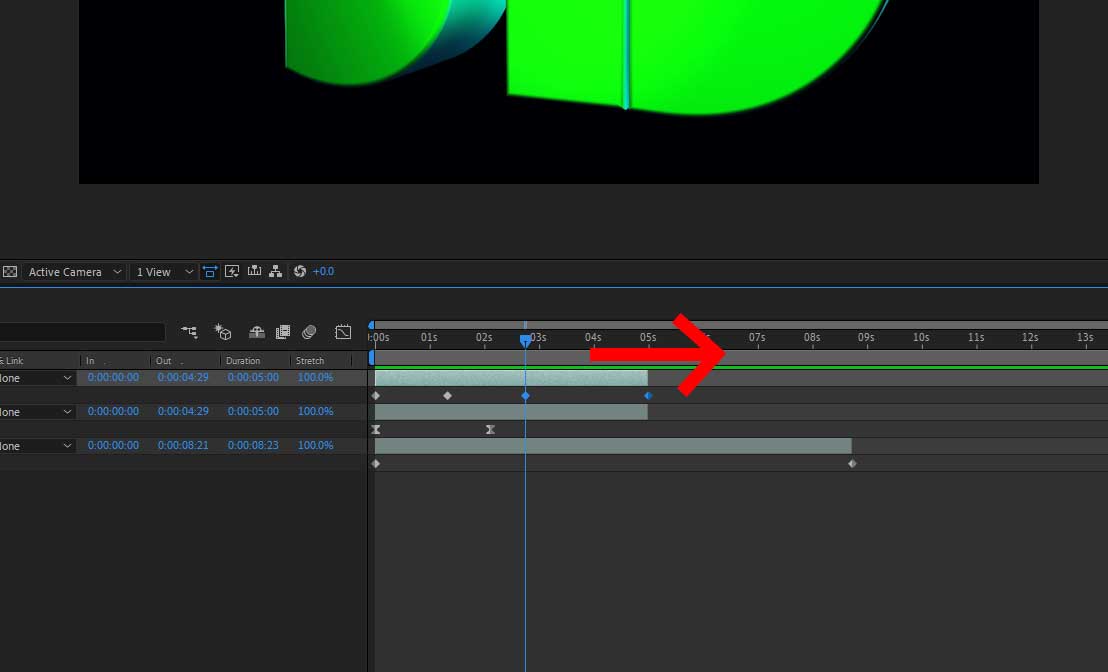
There will be a keyframe at the start and the end of the video or pre-composition. Consider the space between the two keyframes as the entire length of your footage.
By simply dragging the end keyframe closer to the start keyframe, you will speed up the video. However, if you drag the keyframe further away from the starting keyframes, you will slow down the video.

3. Add a smooth speed ramp using the keyframes & easy-ease
Easy ease can be applied to the keyframes; this will work as it should. You can also speed up or slow down parts of the video by isolating the desired part with two more keyframes and then.
For example, move both the keyframes at the end of the desired part and the keyframe at the end of the video to the right, and the video will slow down. You can also move the ones at the start, it will still work, but you will speed it up.

4. Remove still duplicate frames
The downfall of this method is when you want to slow down a video, Time Remap will create still frames. But don’t worry. There is a solution to this problem.
A still frame is a duplicate, consecutive frame usually created by the editing software when the framerate of a video is changed or a slow-down effect is applied, without any frame blending software. When in play, an untrained eye will miss it, but for an expert, it will feel like the flow of the video “skips a beat”.
To avoid still frames created from slowing down the footage, you have to enable the layers Frame Blending checkbox after you activate the composition’s Frame Blending icon. This option will analyse all your frames and will create/adjust new intermediate frames.
Therefore, everything will play smoothly. You will not have to explain to the client why the image stutters. Click it once for normal frame blending and click it twice to allow AE to digitally create new intermediate frames.
Video tutorial for Time Remapping in After Effects
Method 2: Advanced Speed Ramping inside After Effects
This technique is more advanced than anything else in this article — you first have to understand Time Remap. Speed ramping is used when you want to have better control over how the speed of the time breaks or accelerates.
For example, if you want to start really slow, then steadily accelerate, follow with quick acceleration and finally decelerate in a mirror-way as you started.
1. Set keyframes for Time Remap, activate Frame Blending & open the Graph Editor
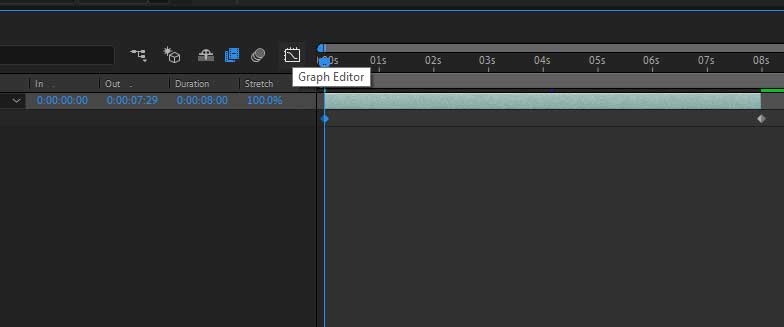
After you set the keyframes for the Time Remap parameter and make sure the Frame Blending option is active, select a keyframe and press on the Graph Editor.


2. Edit the Speed Graph & set the first keyframes
From the bottom of the screen, you will want to change the graph type and make sure it is set to “Edit Speed Graph”, by default, it will show us the Value Graph. Moreover, go back to normal view by clicking again on the Graph Editor, set the first keyframe to “Easy Ease Out” and the last to “Easy Ease In”.
3. Use the yellow handlebars to add a gradient of speed
Press again on the Graph Editor and drag the yellow handlebars as you see fit. I’ll give you an example below:

This is how it looks
This is how it looks in play before and after:
Before
After
Video tutorial for advanced speed ramp
Method 3: Speed up or slow down a clip in After Effects with Time Stretch
Time Stretch is the easiest way to speed up or slow down a clip in After Effects. With just a few clicks, you can finish your job. There is a downfall if you want to slow down clips, it will make still frames, but you can get rid of them by using Frame Blending. In addition, you can only apply it to the whole clip and cut the layer afterward.
1. Go to “Time” > “Time Stretch”
To use it, right-click the layer, go to “Time”, and select “Time Stretch”. A new window will appear here, and just like in Premiere Pro you can select the percentage you want. The only difference is that there is no optical flow or any frame blending option.

Type in the percentage you want and press OK. Whatever value over 100 will slow down the clip, whereas any value under 100 will speed up the clip. This is also different from Premiere Pro’s speed option, where it’s exactly the opposite.
If you want to know more differences between After Effects and Premiere Pro, you can read about them here.
Video tutorial for Time Stretch
Common questions
What happens when you enable time remapping for a layer in After Effects?
When you enable time remapping for a layer, After Effects adds a Time Remap keyframe at the start and end points of the layer. This allows you to animated the velocity of the time remap.
Can you exclude audio from time remap in After Effects?
Yes, you can exclude audio from time remap. This is often done by having a separate audio layer and a video layer (with the audio muted), and applying time remapping to the video layer only.
What happens to the cut time when time remap is applied in After Effects?
The cut time changes when time remap is applied. It doesn’t scale (time) from the cut, it scales from the beginning of the layer.
Summary
To summarise, by following these steps, you will know for sure how to speed up or slow down a clip in After Effects. Furthermore, using the Speed Ramping method, you will be able to control the acceleration or deceleration of the time speed.
I recommend using Time Remapping all the time unless you just need a quick adjustment and nothing more serious.


