


DaVinci Resolve is a powerful video-editing software that’s gaining popularity among both amateur and professional video editors. One of its standout features is the ability to add and customize text in your videos.
This comprehensive guide will walk you through how to add text in DaVinci Resolve, making it an easy process for both beginners and seasoned professionals. Whether you’re creating title sequences, lower thirds, or animated quotes, we’ve got you covered. Let’s dive in!
Why use text in DaVinci Resolve
Text is a versatile tool in video editing. It can be used to convey information, emphasize a point, or grab the audience’s attention.
The text can range from simple title screens or credits to complex motion graphics with slick animation and colorful fonts. The text you use will depend entirely on the type of content you’re creating.
Adding text in DaVinci Resolve
Adding text in DaVinci Resolve is a straightforward process. Here’s a quick overview:
- Go to the “Edit” panel.
- Open the “Effects” library.
- Drag & drop “Text” to your timeline.
- Choose the text settings such as Font, Size, and Content. You can find this in the “Inspector” panel.
Now, let’s dive into the detailed guide:
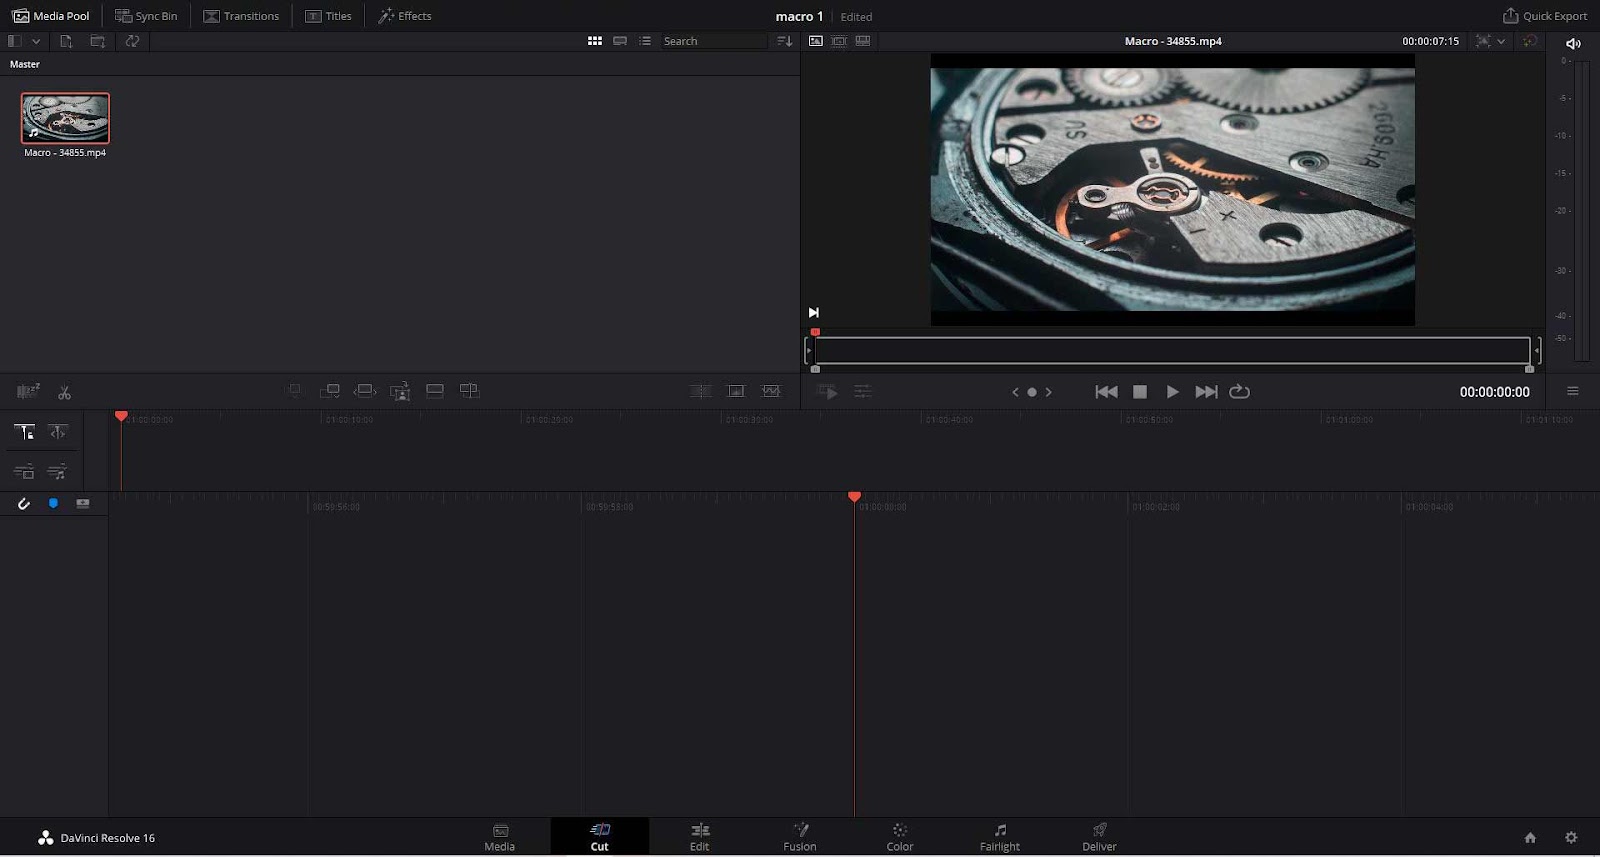
1. Import your video to the project
The first step is to add your video to DaVinci Resolve. You can do this by pressing “Ctrl-I” to import media or going to “File”, “Import File”, and then “Import Media“.
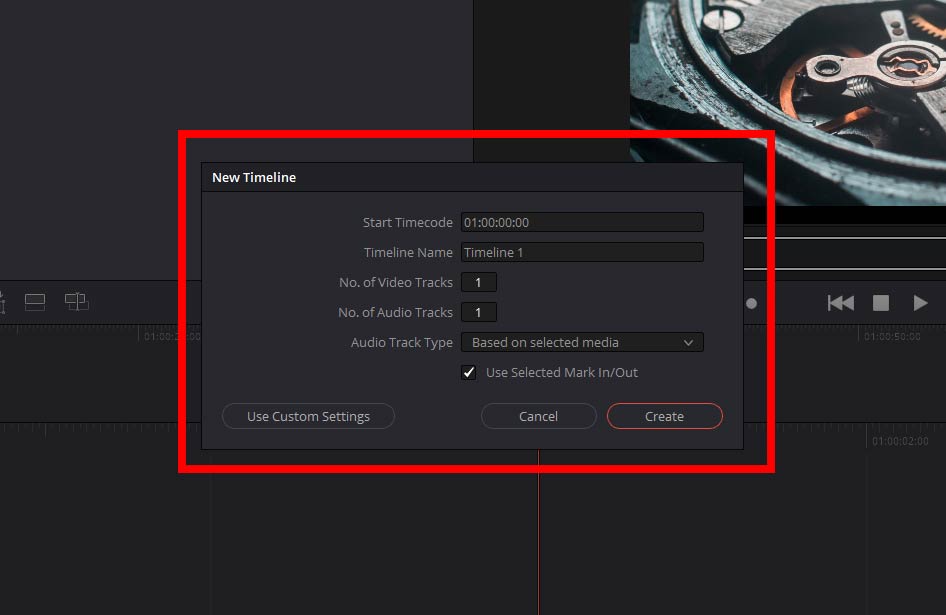
2. Create a new timeline, then add your video to it
To start working on a new project in DaVinci Resolve, you must create a new timeline. You can do this by going to the “File” menu and selecting “Create a new timeline“. Alternatively, you can click on your video and choose “Create New Timeline Using Selected Clips“. A prompt will open, allowing you to create your new timeline.
You can easily switch between different panels by using the control panel at the bottom of the screen.

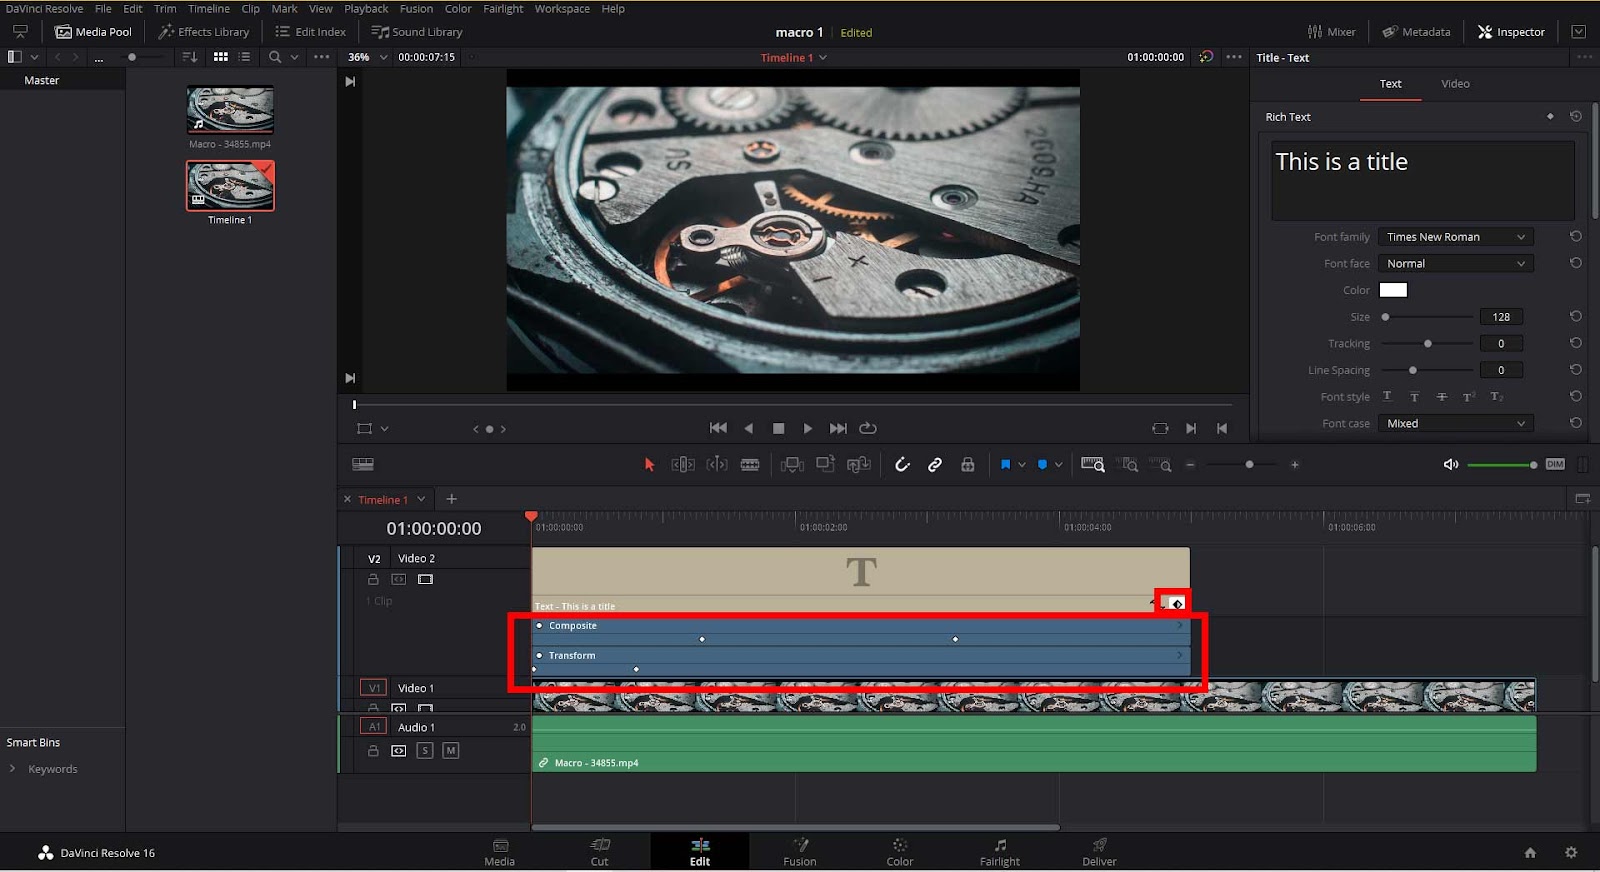
4. Open the “Effects” library & create your text
In the “Effects Library“, you will find a variety of effects you can apply to your video. For adding text, we are interested in the “Title” effects. Drag and drop the “Text” effect on top of your video.
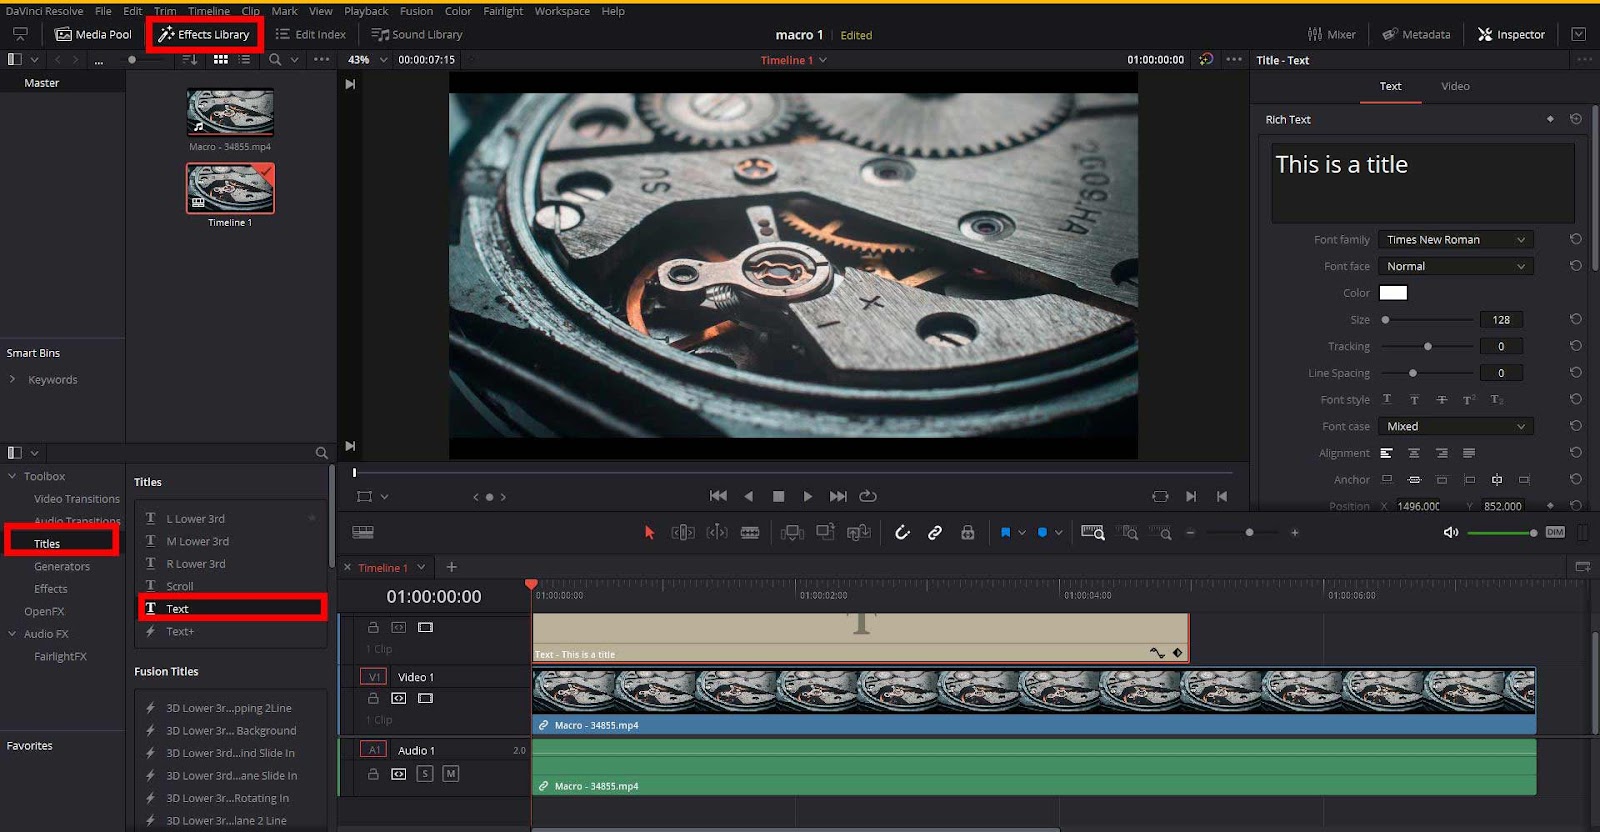
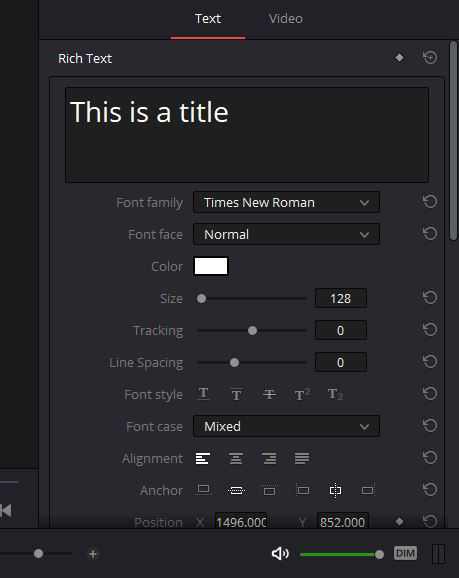
5. Choose the text settings such as Font, Size, etc.
After you add the text effect, it’s time to customize the text. You can change everything from the text to its size and color, to the background if you want it to have a background and its position.
Just like in Premiere Pro, you can play with the keyframes in DaVinci Resolve to create something unique. For example, you can add a zoom and fade effect on the text, so as the video plays, the text zooms in on the screen and disappears.
6. Create keyframes for your text to add animation
To see your keyframes, you will need to click on the small diamond-shaped button under the video. This allows you to animate the text, giving you a lot more control over how and when the text appears and disappears.
Adding subtitles in DaVinci Resolve
DaVinci Resolve also has the option to add subtitles very easily. You just need to drag and drop the “Subtitle” effect on your video and edit it there. You can edit the time in and out and the text.
How to add text in DaVinci Resolve: Video tutorial
Various creative ways to add text in DaVinci Resolve
- Title Sequences: Use text to create engaging title sequences at the beginning of your videos. You can animate the text to move in interesting ways, change colors, or interact with other elements in the video.
- Lower Thirds: Lower thirds are a great way to introduce characters or provide additional context in your videos. They typically appear at the bottom of the screen and include a person’s name and their role or a brief description.
- Animated Quotes: If your video includes interviews or speeches, you can highlight important quotes by animating them on the screen. This can help emphasize key points and make your content more memorable.
- Text-Based Transitions: Use text as a transition between different scenes or segments in your video. For example, the text could grow to fill the screen, acting as a transition to the next scene when it shrinks back down.
- Kinetic Typography: This is a technique where the movement of text is an integral part of the message being conveyed. For example, if someone in your video is talking about growth, the text could start small and grow larger. Adobe’s guide on Kinetic Typography is a great resource to learn more about this technique.
- Text Masks: Use text as a mask to reveal parts of a video or image. This can create a visually interesting effect where the video or image is only visible within the boundaries of the text.
- Callouts: Use text to draw attention to specific parts of your video. For example, if you’re creating a tutorial, you could use text to label different parts of the product you’re demonstrating.
- Subtitles and Captions: Beyond their traditional use for accessibility, subtitles and captions can also be used creatively. For example, you could use different colors, fonts, or animations to reflect the mood, tone, or energy level of the dialogue. Check out our guide on how to add subtitles in DaVinci Resolve.
- Credits: At the end of your video, use text to credit the people who worked on it. You can get creative with the animation, layout, and design of your credits to leave a lasting impression on your viewers.
- Background Text: Use text in the background to create depth and interest. This could be a large, faint piece of text that’s related to your video’s theme.
Remember, these are just ideas to get you started. The possibilities are endless when it comes to using text creatively in DaVinci Resolve. Don’t be afraid to experiment and try new things!
Conclusion
Adding text in DaVinci Resolve is a simple and intuitive process. Whether you’re a beginner or a seasoned professional, this guide should help you navigate the process and make the most out of DaVinci Resolve’s
text capabilities. With a bit of practice, you’ll be able to add and customize the text in your videos with ease, enhancing the overall quality and impact of your content. So, start experimenting with text in DaVinci Resolve and see how it can transform your videos!
For external resources, the official DaVinci Resolve Training and Certification from Blackmagic Design offers in-depth courses and exams. You can also find a wealth of information and community support on the DaVinci Resolve section of the Blackmagic Design user forums.
Remember, practice makes perfect. So, don’t be afraid to experiment with different text styles and animations. Happy editing!


