


If you’re a video editor, there will most likely come a time when you need to separate audio from video. You may need to use only the audio from a particular clip, or you may need to use only the video from a particular clip. Whatever the reason, separating audio & video in DaVinci Resolve is a relatively simple process you can do in just a few steps.
To separate audio & video in DaVinci Resolve, right-click the clip in your media pool and select “Extract Audio”. DaVinci Resolve will have now created a separate WAV file that solely contains your audio.
As always, we’re using the latest version of DaVinci Resolve 18. We highly recommend you update your DaVinci Resolve software as soon as possible if you haven’t already.
Quick way: Using the Shift key (Method 1)
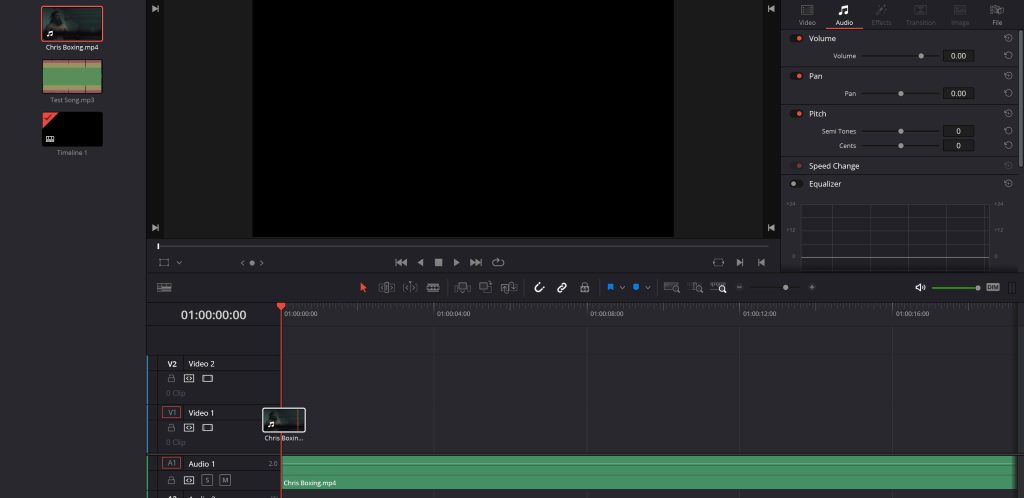
You can use only the audio from a video clip in your media pool without extra effort.
Hold down the Shift key on your keyboard, select the video clip you want to use the audio from, and proceed to drag it to your timeline while still holding down the shift key.
This will only use the audio from a clip within your media pool.
More methods – Separating audio & video in DaVinci Resolve
We have multiple ways you can separate audio & video in DaVinci Resolve. Feel free to pick your favorite method or the quickest one to do the job.
Method 2 – Extract audio method
This is one of the quicker ways to separate audio & video in DaVinci Resolve. We’ll go over it in quick detail.
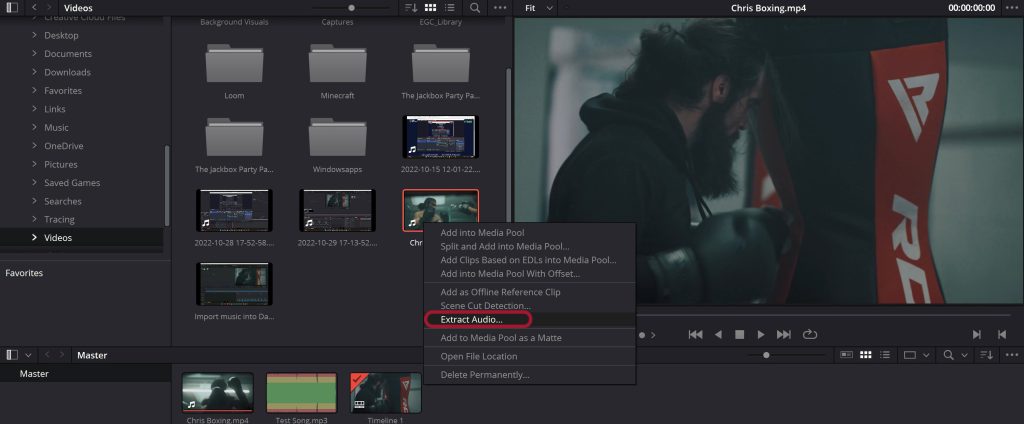
1. Locate your file in the media pool
The media pool is located under the media menu tab at the bottom of the DaVinci Resolve software. Once here, navigate to your file using the media pool in the top-left part of the software.

2. Right-click and select “Extract Audio”
Right-click on the clip you want to extract audio from and select the “Extract Audio” option. DaVinci Resolve will now have created a WAV file that solely contains the audio from your clip.
Congratulations, you’re now finished with extracting audio from your video file.
Method 3 – Link/Unlink clips method
Tip: If you already have your video clip in your timeline, you can skip to step 3.
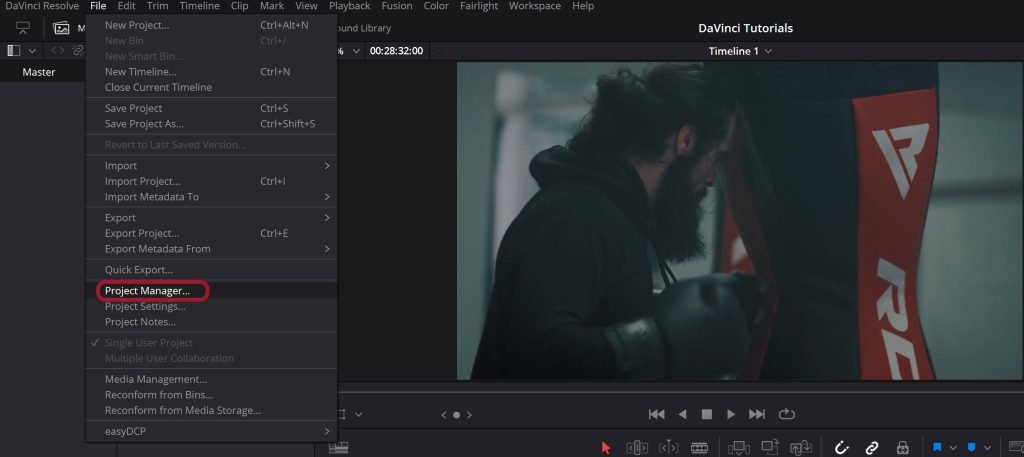
1. Launch the project you want to work on
Launching your project is the first step in separating the audio & video in DaVinci Resolve. That way, you’ll be able to access all the files and elements needed for your video editing project.
Here are the steps to launching the project:
- Open the DaVinci Resolve software on your computer.
- Click on the “Project Manager” tab under “File“.
- Click the “New Project” button to launch a new project or select an existing project.
- Name the project and click “Save” if creating a new one.
2. Load the video clip you want to work with
Once your project is open, it’s time to load the video clip from which you want to extract the audio. Here are the steps:
- Click on the “Media” tab in the DaVinci Resolve interface.
- Browse to the location of your file, then click on it to select it.
- Click “Import” to load the file into DaVinci Resolve.

3. Right-click your video clip in the timeline
Once your video clip is placed on the timeline in DaVinci Resolve, you can separate the audio from your video and give it its own track.
- Right-click your video clip in the timeline
- Select “Link Clips”. This option should no longer have a tick next to it once you’ve selected it.
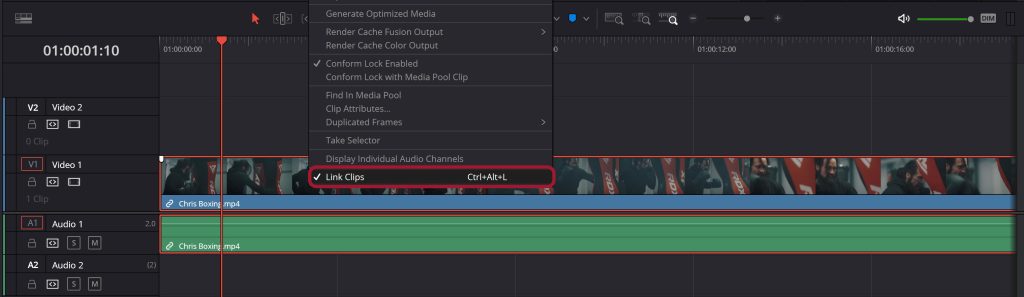
The clips should be separated now, and you’ve followed the above steps correctly.
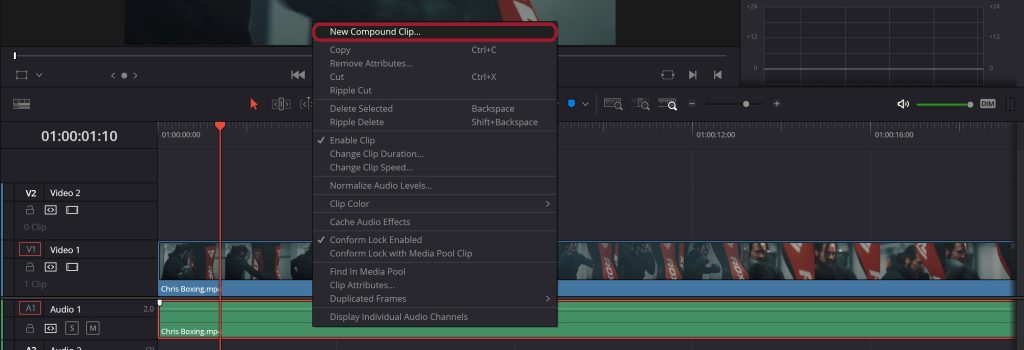
Optional step: Adding the new audio clip to your media pool
You can add the now separated audio clip to your media pool by right-clicking the clip and selecting the option “New Compound Clip“. Make sure to give it a clear name. You should now see the newly named audio clip in your media pool for future use in your project.
Video tutorial
Final
Separating audio & video is a quick and easy process that can be done in just a few steps using DaVinci Resolve. So next time you need to use only the audio or the video from a particular clip, don’t hesitate to try this method.


